Showing posts with label black. Show all posts

Thursday, 14 February 2013

Owl Always Love You

Happy Valentine's Day! I'm single (again) this year, but instead of moping I like to think of it as a 'me' day. So I'll be spending the day with my hamster Claude, plus Molly Ringwald and the rest of the Brat Pack - yup, I will be watching cheesy eighties films this evening. :) Are you doing anything for Valentine's Day this year?

My Valentine's manicure this year is based on a design by Chalkboard Nails. She freehanded an adorable pair of owls and I knew I had to give it a go. I love owls - according to my parents I've been obsessed with them since I was little - and recently I've been going owl mad. I've bought an owl necklace, jumper, snood and ring. Owl nails seemed an obvious progression!

The base colour for this design was OPI My Very First Knockwurst, a pinky nude. The two pinks I used for the owls themselves are Essie Tour de Finance and Essie Sure Shot (which I also used for the hearts on my thumb). The heart-shaped rhinestones are from a set I got on eBay.

Right, I'm off to watch Sixteen Candles and eat too much chocolate. Have a great day!

Sunday, 10 February 2013

Studded Leather Nails

Good evening! Yesterday I showed you the Nails Inc leather effect polish in Noho, and today I'm showing you some nail art I did with it. I used the nail glue that comes with the set and some square gold studs from the Born Pretty Store to give my nails the look of studded leather.

I really liked wearing this but it's not very practical for everyday wear! I think it would look great for a night out though. :)

Saturday, 9 February 2013

Nails Inc Leather & Skulls in Noho

Hello! Today I have one of the Nails Inc leather effect polishes to show you. I think 2013 is going to be the year of the textured nail polish, and Nails Inc is always at the forefront of new trends. When I first heard of the leather effect polish I presumed it would simply dry to a rubberised finish, but in actual fact it's much cooler than this; it dries slightly bumpy and really does resemble leather.

I used two coats of the leather effect polish. It's not quite as opaque as a normal black so it does really need both coats. It takes a little longer to dry than normal nail polish and you obviously can't apply a top coat or it will ruin the effect, but as long as you're prepared to wait it's fine. It's worth noting that while the polish doesn't dry smooth it also isn't gritty - it doesn't snag on anything. I actually found it quite entertaining to stroke my nails with this on!

The set costs £19 on the Nails Inc website and includes some 3D skulls, but I chose not to use these. I did, however, do some different nail art with this polish, which I'll show you tomorrow. :)

Have you tried the Nails Inc leather effect polish? What do you think of the texture trend? Are you a fan or do you prefer a smooth finish?

Monday, 21 January 2013

OPI Stay the Night (Liquid Sand)

Good evening! Today I have one of OPI's new Liquid Sand effect polishes to show you, Stay the Night. I ordered this and Can't Let Go online before Christmas but they only arrived on Friday...and, fair warning, I am about to rant about why.

I ordered from Nail Polish Direct and my previous experiences with them have been very good, but there is no way in H-E double hockey sticks I'm ordering from them again. When my order hadn't arrived after two weeks I emailed them twice to ask where it was and received no reply either time. Like I said, it finally arrived on Friday with no word, just as I was planning to see if I could get my money back through PayPal. Their Facebook page, it turns out, is full of stories similar to mine - although I'm one of the lucky ones because my order did eventually turn up. So basically...order from them at your own risk.

An-y-way. I had to put Stay the Night on immediately. It has a black base with hot pink glitter and dries to a gritty finish. I thought it would mostly just be like glitter that hasn't been top-coated, but it's definitely got something matte going on. I used two coats for the photos.

I wasn't sure what I'd think of the Liquid Sand effect but I actually really like it. I'm still wearing it and I keep running my fingers over my nails to feel the texture. It's rough but not enough so that it's going to catch on anything. My dad is usually pretty uninterested in my nails but when I showed him these he thought they were pretty cool - then suggested I sandpaper the banister with them!

Have you tried any of the OPI Liquid Sand polishes? What do you think of them?

Sunday, 13 January 2013

Glitzology Swatches - Part Two

Good evening! This is the second part of my swatches from the indie brand Glitzology; you can find the first part here.

Bad Things is inspired by the TV show True Blood, so I knew I had to buy this polish. It has a deep red jelly base with different shaped red glitter, small black hexes, and silver holographic micro glitter. It also has red hearts - you can see one on my middle finger! This is a surprise favourite for me; I didn't expect to like this polish quite as much as I do. You can build it to opacity on its own but I chose to layer one coat over Orly Ruby.

Second is Diet Cokehead. I love love LOVE the name of this one - it describes me perfectly! Hello, my name is Sophie and I am a Diet Cokehead. I drink it every day (sorry, teeth). Anyway, the polish contains red square and hex glitter, black hexes, and red and black bar glitter in a shimmery silver base. Basically, it looks exactly like a can of Diet Coke can. As with Bad Things it's opaque on its own but I layered it over Barry M Silver Foil instead.

Finally I have Snow Day to show you. It has matte white glitter and disco glitter (which looks slightly yellow in my photos for some reason...) with an iridescent blue shimmer. It's a wintry polish but I think it can look good all year round depending on what you wear under it; I used Essie Borrowed & Blue here. It's packed with glitter so I dabbed it on rather than applying normally, but it wasn't really a bother.

As with yesterday's, the polishes needed two coats of top coat to make them perfectly smooth, and there were no curling glitters. I am a huge fan of Glitzology now and I'll definitely be placing another order very soon. :)

Saturday, 12 January 2013

Glitzology Swatches - Part One

Good afternoon! Today and tomorrow I'll be showing you some nail polishes from the indie brand Glitzology. It's quickly become one of my favourite indies, both for the quality and uniqueness of the polishes and for the fantastic customer service. The three you'll see today are glitter bombs in clear bases; the ones tomorrow each have a coloured base.

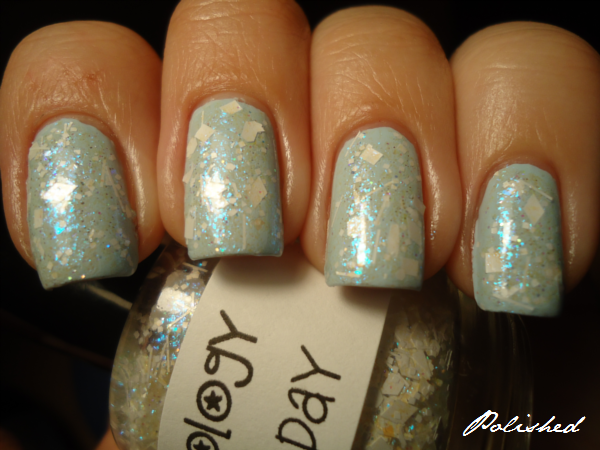
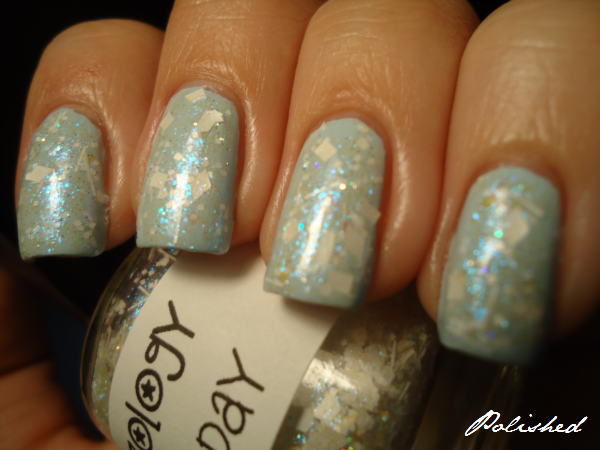
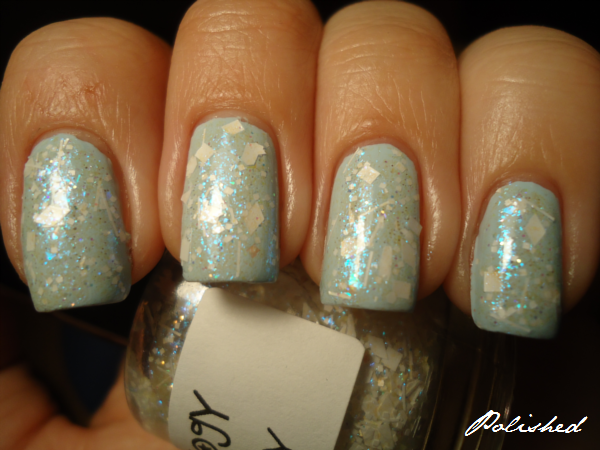
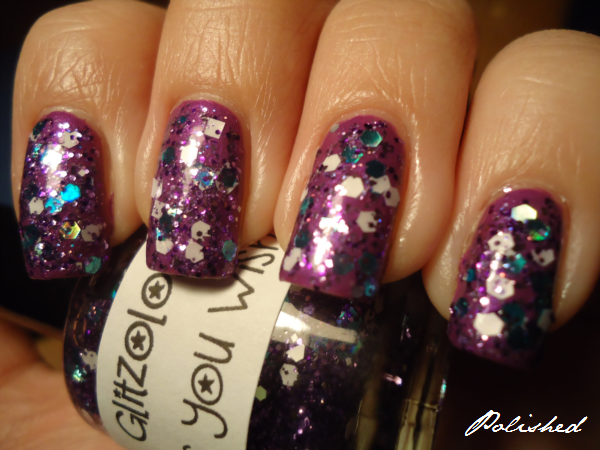
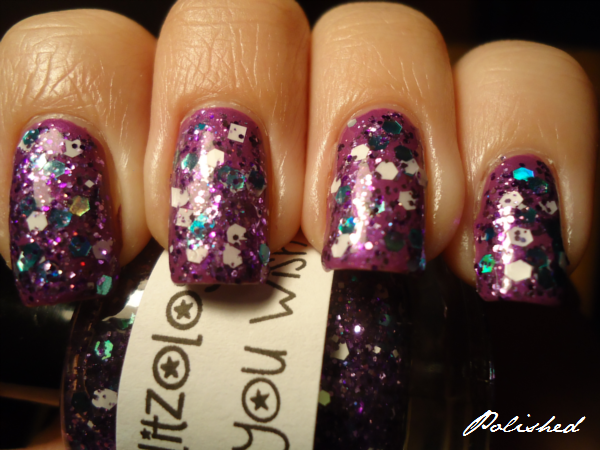
First up is As You Wish. I'm not ashamed to admit I bought this mostly for the name, as The Princess Bride is one of my favourite films. It has large white and holographic teal hex glitter and smaller fuchsia and lavender glitter in a clear base. I layered it over China Glaze Gothic Lolita; there is a lot of glitter in As You Wish so I had to be quite careful applying it that I didn't overload my brush. It gave great coverage in just one coat.

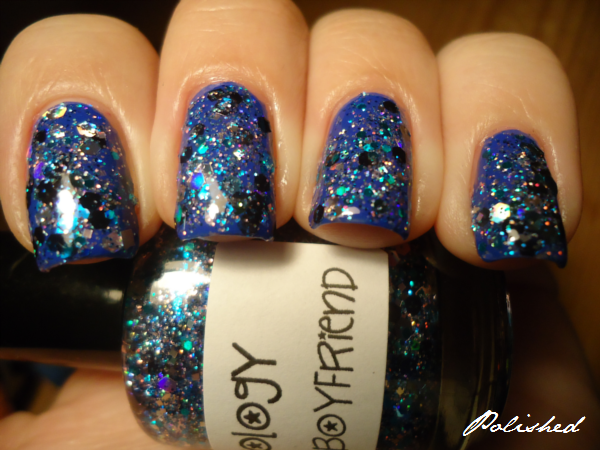
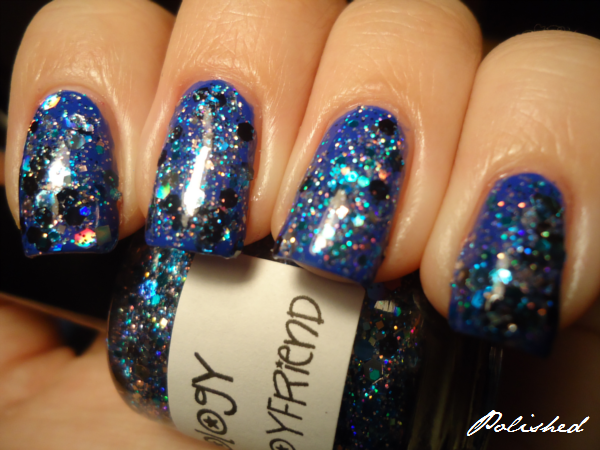
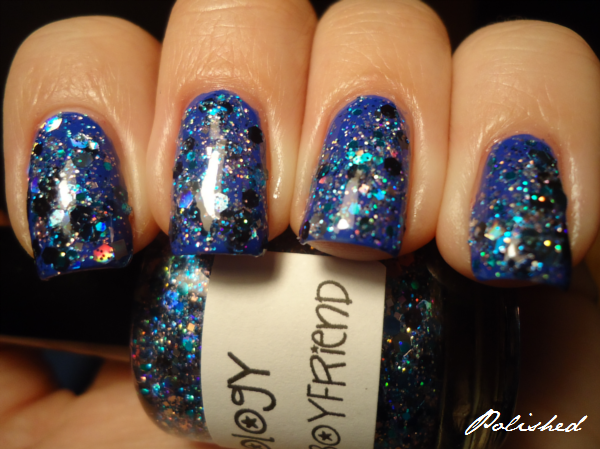
Next up is My Viking Boyfriend. The creator of Glitzology, Stacy, says this is named for her boyfriend, which I think is really cute. This is blue and silver holographic hex glitter, silver squares, dark blue hexes, and silver holo micro glitter. As with As You Wish it's absolutely packed with glitter, so I found it easier to dab it on rather than apply it normally. This is one coat over Nails Inc Baker Street.

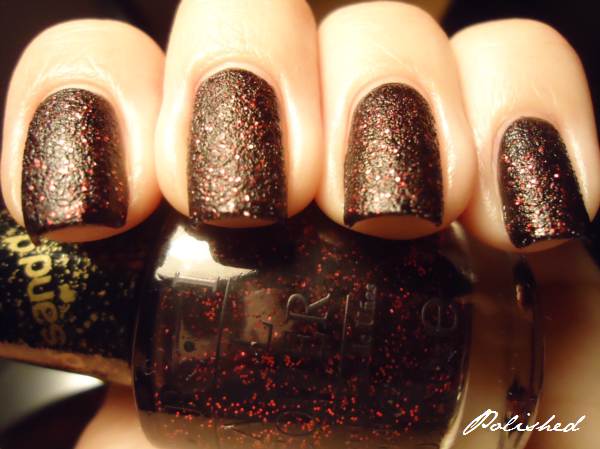
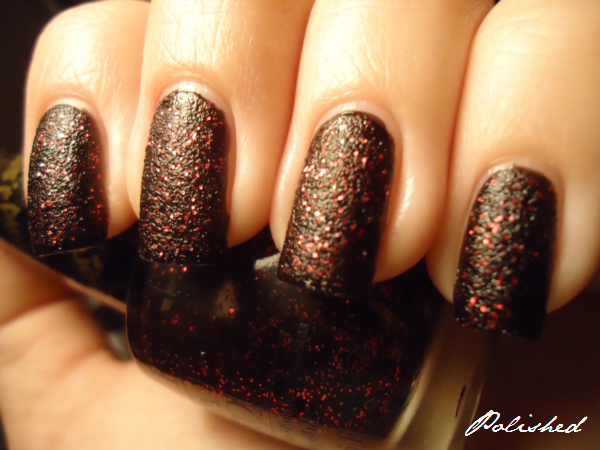
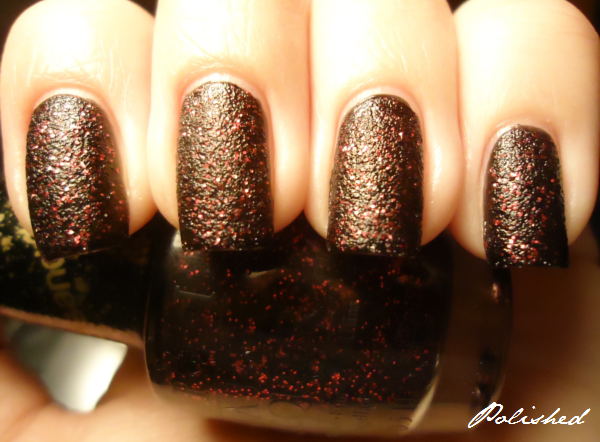
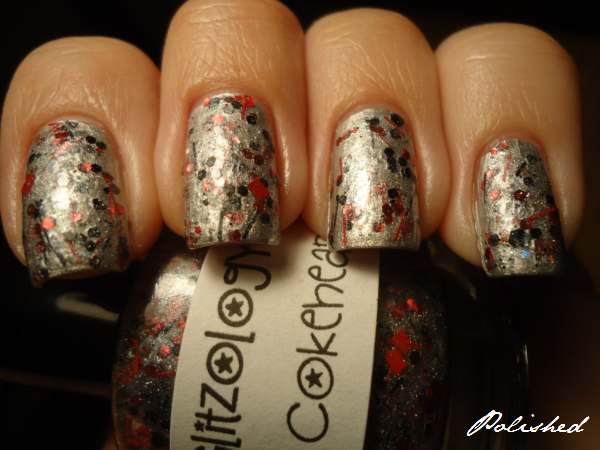
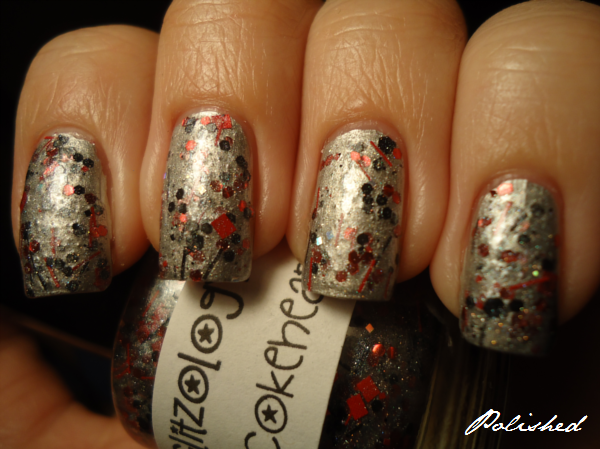
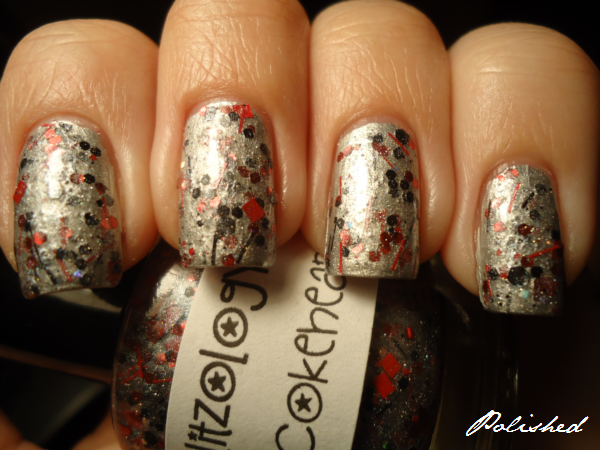
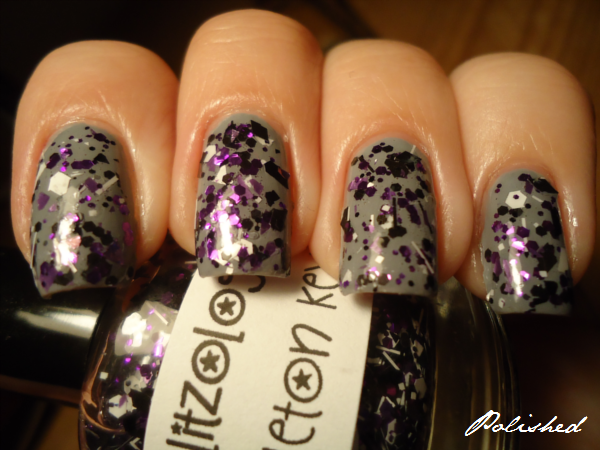
Finally I have Skeleton Key. I believe it's inspired by the movie Beetlejuice, which I haven't seen. I absolutely love this one, I think it's my favourite of the three. It has matte black and white glitter (instant WIN) and two shades of purple glitter, all of various shapes and sizes. It contains bar glitter so if don't like that I'd steer clear; I personally love bar glitter! Again this polish is crammed with glitter so you have to be a little careful applying it. I layered one coat over Rimmel Grey Matter; as you can probably tell, I did a slightly thicker coat on my middle finger.

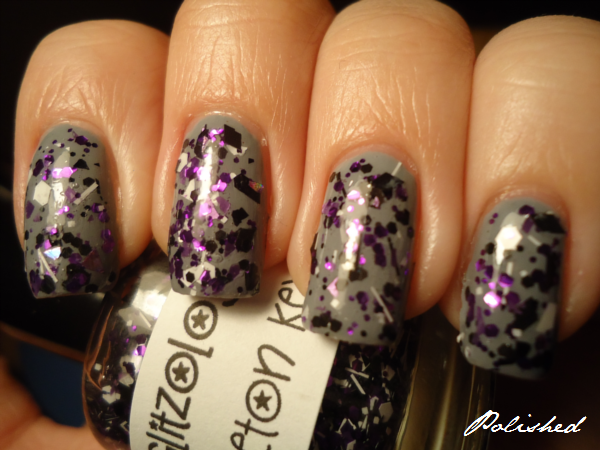
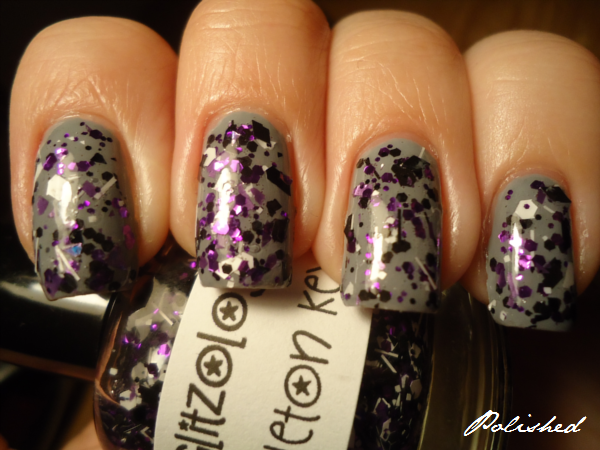
As a general note about all three polishes, they gobble up top coat so I did two generous coats of Poshe to make everything smooth. I'm happy to report I didn't experience any problems with curling glitters (hurrah!). Thanks for reading and pop back tomorrow for part two! :)

Wednesday, 2 January 2013

Happy New Year!

I'm a day late, but happy new year! Did you do anything exciting? A couple of friends and I went to the top of a hill and watched about ten different firework displays going off in the town below us. It was really beautiful.

Today I'm showing you the manicure I wore to celebrate. It doesn't really scream 'New Year' but I haven't done leopard print in a while so that's my excuse! I used a base of OPI Don't Pretzel My Buttons, which is now my go-to nude shade, and China Glaze Angel Wings, a dense gold glitter, for the blobs. Finally I outlined it using my trusty black Models Own Wah nail art pen.

This might be one of my favourite leopard print designs yet! :) What did you wear on your nails to ring in the new year?

Sunday, 30 December 2012

Black and Gold French Tips

Evening! It was my birthday on Friday - yup, I was born only three days after Christmas. A lot of people seem to think this sucks, but I actually really like it. I don't usually have to work on my birthday, and my friends are usually all around too so it works out pretty well. I turned a quarter of a century old so to mark this feat I went on a night out with my friends. I was pretty restrained in my alcohol intake and only got a little tipsy, yay me. I was wearing five inch wedge boots so my feet were not happy by the end of the night, but apart from that I had a great time. :)

Because I am a weirdo I always like to have a colour theme when I go on a night out, and for my birthday it was black and gold. For my manicure I started with OPI Goldeneye and added a coat of holographic glitter, China Glaze Golden Enchantment, on top. Once it was completely dry I used tape to paint the tips black. Simple but effective.

Do you have a colour theme in mind when you dress up for a night out, or are you less anal than I am? How do you do your own nails for your birthday?

Wednesday, 26 December 2012

KIKO Holographic Nail Lacquers

Evening! Did you have a good Christmas? I had a very relaxing day with my family which was nice. My birthday is in two days so I'm looking forward to that now. :)

Today I'm showing you three of the four KIKO Holographic colours that came out a while ago. I got these in London in October but only got round to wearing them quite recently. Shame on me! A general thing I want to mention about these is that the formula is better than I'm used to with holographics - I used a normal base coat underneath without any problems. They all dried to a slightly matte finish so I risked using top coat on them, and I think rather than dulling the holographic effect, it enhanced it. o.0

First up is KIKO 400/Steel Grey, a grey/black shade that was opaque in two coats. This was the most holographic of the three. I decided to test the wear on this so the photos were taken after three days; there is tipwear but it's not horrendous (unlike some holographic polishes that chip after a couple of hours!). I think being able to use a top coat with these is a great advantage.

Second is KIKO 401/Peacock Green - don't be fooled by the name, it's actually a very pretty blue-with-a-splash-of-turquoise colour. I used three coats for full coverage. There is a bonus photo of what it looks like in daylight because I was actually around during the day when I wore this one (gasp!).

Last but not least is KIKO 402/Jewel Pink. The name of this confused me because I thought it was red! I did some Googling and apparently it is pink...but I swear it still looks red to me. Hmmm. Anyway, this was the least holographic of the three and was opaque in two coats.

Sunday, 23 December 2012

Christmas Penguins

Evening! I have my final Christmas design for you today. I wore this to my work's Christmas lunch last week because it matched my jumper, which is this cute one from ASOS (that is obviously not me wearing it. I only wish I was that slim):

Before painting the design on my nails I did some Googling to see how other people had done penguin manicures. To be honest I wasn't overly impressed with most of them, so in the end I blagged it and just tried to loosely copy my jumper. And here's the result:

The black and white are Barry M polishes, the beak and feet are Topshop Louder, the gold bow tie is China Glaze Angel Wings, and the red bow tie plus red nails are China Glaze Ruby Pumps.

Aren't the penguins super cute?! I absolutely love how this turned out, and I received so many compliments from co-workers at our lunch. Yay for penguins!

This will probably be my last post before Christmas. I'm having a quiet one at home with my family and hamster Claude, what about you? So yeah... Merry Christmas!