Sunday 17 March 2013

St Patrick's Day Cling Film Nails

Happy St Patrick's Day! Are you doing anything to celebrate? I've been at work today so I think I'm just going to take it easy, but I did paint my nails last night to reflect my Irish ancestry (I'm a quarter Irish). I decided to do a cling film/saran wrap manicure because I haven't done one since the Olympics last year!

I started with two coats of Revlon Minted and, when this had dried, painted on a coat of Essie Mojito Madness. When this was still wet I dabbed it with scrunched up cling film and followed with a coat of China Glaze Golden Enchantment for a bit of sparkle.

You can see last year's St Patrick's Day nails here.

Monday 11 March 2013

Pastel Retro Squares

Good evening! Sorry I haven't blogged for a while, life got in the way. :( I'm back with a fun nail art design inspired by spring and the sixties: pastel retro squares. I chose pastel colours because I thought it was very nearly spring. Having said that, I did this design on my nails last night and woke up this morning to a blizzard!

I started with a white base before using striping tape to mark off the squares. I used the bottle brushes to carefully paint each coloured square - you definitely need steady hands for this! The colours I used are OPI Done Out in Deco (lilac), OPI Banana Bandanna (yellow), Revlon Minted (green), and a random Color Club pink that doesn't seem to have a name.

I'm pretty pleased with how this turned out, but if you look closely you can see the white bled a bit on my index and little fingers. Boo. Oh well, you can't tell from a distance. :)

Saturday 16 February 2013

Dior Rosy Bow

Good evening! I have a polish from Dior's Spring collection to show you today. Rosy Bow is a gorgeous pink creme shade with a hint of coral. I'm not usually drawn to pinks but when I saw this one in store I knew it had to come home with me! The formula was brilliant, I used two coats and had no problems.

It's a bit more pink than it appears in my photos; it's one of those shades that's very difficult to photograph accurately!

Thursday 14 February 2013

Owl Always Love You

Happy Valentine's Day! I'm single (again) this year, but instead of moping I like to think of it as a 'me' day. So I'll be spending the day with my hamster Claude, plus Molly Ringwald and the rest of the Brat Pack - yup, I will be watching cheesy eighties films this evening. :) Are you doing anything for Valentine's Day this year?

My Valentine's manicure this year is based on a design by Chalkboard Nails. She freehanded an adorable pair of owls and I knew I had to give it a go. I love owls - according to my parents I've been obsessed with them since I was little - and recently I've been going owl mad. I've bought an owl necklace, jumper, snood and ring. Owl nails seemed an obvious progression!

The base colour for this design was OPI My Very First Knockwurst, a pinky nude. The two pinks I used for the owls themselves are Essie Tour de Finance and Essie Sure Shot (which I also used for the hearts on my thumb). The heart-shaped rhinestones are from a set I got on eBay.

Right, I'm off to watch Sixteen Candles and eat too much chocolate. Have a great day!

Sunday 10 February 2013

Studded Leather Nails

Good evening! Yesterday I showed you the Nails Inc leather effect polish in Noho, and today I'm showing you some nail art I did with it. I used the nail glue that comes with the set and some square gold studs from the Born Pretty Store to give my nails the look of studded leather.

I really liked wearing this but it's not very practical for everyday wear! I think it would look great for a night out though. :)

Saturday 9 February 2013

Nails Inc Leather & Skulls in Noho

Hello! Today I have one of the Nails Inc leather effect polishes to show you. I think 2013 is going to be the year of the textured nail polish, and Nails Inc is always at the forefront of new trends. When I first heard of the leather effect polish I presumed it would simply dry to a rubberised finish, but in actual fact it's much cooler than this; it dries slightly bumpy and really does resemble leather.

I used two coats of the leather effect polish. It's not quite as opaque as a normal black so it does really need both coats. It takes a little longer to dry than normal nail polish and you obviously can't apply a top coat or it will ruin the effect, but as long as you're prepared to wait it's fine. It's worth noting that while the polish doesn't dry smooth it also isn't gritty - it doesn't snag on anything. I actually found it quite entertaining to stroke my nails with this on!

The set costs £19 on the Nails Inc website and includes some 3D skulls, but I chose not to use these. I did, however, do some different nail art with this polish, which I'll show you tomorrow. :)

Have you tried the Nails Inc leather effect polish? What do you think of the texture trend? Are you a fan or do you prefer a smooth finish?

Thursday 31 January 2013

Sonnetarium After the Rain & If We Could Meet By the Sea

Good evening! Sorry for not posting for a bit, I've been on a course in Wales. To make it up to you I'm showing you two swatches from the indie brand Sonnetarium. I've had these for a while - I bought them at the same time as Samurai Princess - and I've worn them both before, but kept forgetting to photograph them. Anyway, here they are.

After the Rain has a blue shimmer base with multi-coloured glitter - I could see white, red, green, yellow and purple glitter. The base is pretty opaque so it doesn't need undies; this is two coats on its own. It has a great balance of glitter to base and was a breeze to apply.

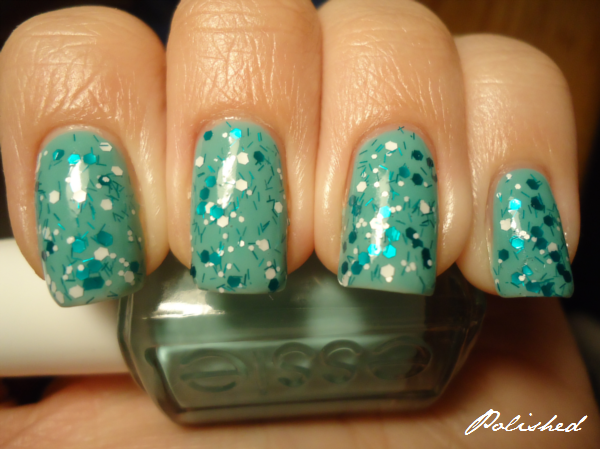
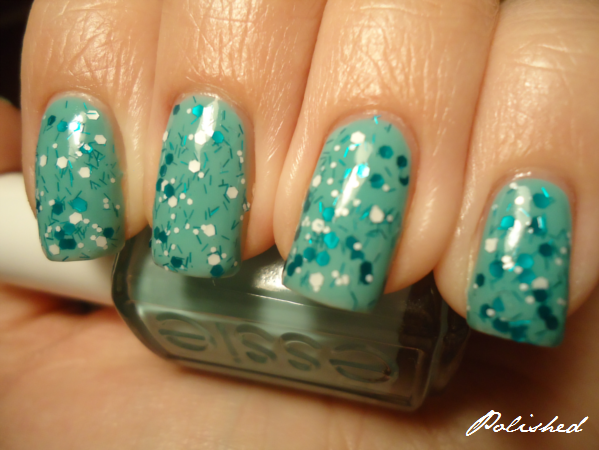
If We Could Meet By the Sea has small teal and white hex glitter, smaller white glitter and teal bar glitter in a clear base. It's a really pretty combination and it does remind me a bit of the ocean. I've shown a single coat over Essie Turquoise & Caicos - again, it application was very easy. I think this is my favourite of the two!